It is a lot of fun to go hoverboarding. That is a given! But do you want to know what is even more fun? Hoverkarting! Yes, you read that right. But more the times, people do own a hoverboard but they do not have a hoverkart. Are you wondering about what dodo in a situation like this?
No need to worry any further! Because we have got your back like we always do! We have the best hoverboards for sale. We also offer the best hoverboard bundles for the summer. So go and get yourself one right now before they go out of stock!
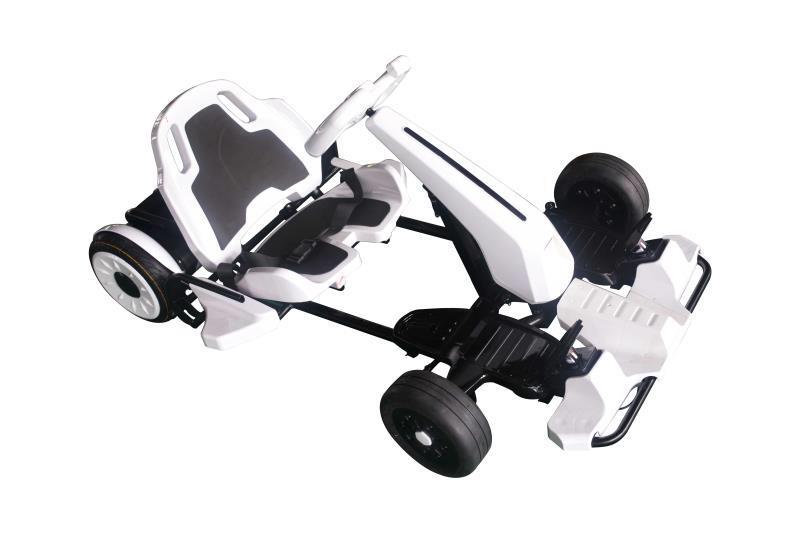
We will teach you how to attach hoverkart straps to your old and boring hoverboard!
- Stage 1:
The first thing you need to do is to find the instruction manual that came with the hoverkart attachment that you have bought. It is very important to read those instruction manuals. Many people do not read them. They think it is not useful. This is completely wrong. The manufacturer has written and printed it ours for you and only you. As a consumer, it is your responsibility to not throw them out and save them. So that you can read them whenever you need it.
- Stage 2:
Once you have located your instruction manual, what you need to do now is to read it and assemble all the parts of your hoverkart. It is very easy. All you have to do is that follow the step by step instructions carefully. In no time, you will have your hoverkart assembled! It is very important to keep in mind this step. So do not forget it as it is crucial. It is very important to assemble your kart in the right way. Once you do it the right way, then things will go on smoothly from there for you. So if you want to save yourself some extra hassle then do it right and slowly.
- Stage 3:
The next step that is stage 3 is called the leveling method. You need to rest the hoverkart on the upper surface of the hoverboard. You have to do this process in such a way that everything is safe and balanced. Always remember that balance is the key. You always have to maintain an accurate balance. Because if you do it right, then you will not face any further problems. You will not have to get stuck in the process of assembling because it will go on smoothly. The second benefit of balancing perfectly is that you will be always safe while riding your kart. There will be no chance to fall down because you have balanced it perfectly beforehand.
- Stage 4:
Now you have to push the straps of the hoverkart attachment kit. You have to push it through the given kit. The next and most important thing that you need to do now is to loop. You have to loop the straps tightly and securely all around the hoverboard. Make sure that you perform this activity in such a way that the straps are looped around in a super tight way.
- Stage 5:
Always remember and never forget that patience is the key to do any job right! If you want to succeed in your task then be slow and gentle. If you do things fast there is a chance that you will mess up the things. That is why stay calm and do everything perfectly. Because safety is the most important thing ever. You do not want to mess with your security. Assemble each and every part perfectly on to the board and kart. If you do this right, there you will never run into any type of problems regarding your hoverboard and DIY hoverkart. It is a lot of fun to ride on and the kids just love it!
Now you can use the lever on both of the sides as steering wheels and you are good to go!


No Comments